Rancher is a complete Kubernetes management tool which simplifies the Kubernetes cluster management. It is an open-source multi-cluster orchestration platform which addresses operational and security challenges. In this tutorial, we will use Rancher to deploy our Kubernetes cluster locally.
Prerequisite:
Before starting, we need to setup a static private IP to our host machine. In my case it is 192.168.1.185. It might be different on your side. So grab your private IP address from the network interface. If it’s not static, make it static so that it won’t change after reboot. Later we will setup a private registry in our host machine where we need to use the registry IP address. So note it down.
Next setup vagrant in your machine. Head over to https://www.vagrantup.com/downloads and download and setup vagrant according to your machine.
By default, vagrant uses virtualbox as the provider. However, if you are using Linux, you can use libvirt as a provider since KVM is a suitable alternative of virtualbox for Linux machine.
Next we will launch three virtual machines with vagrant. The following Vagrantfile will spawn 3 ubuntu-20.04 nodes. Each will have 2 vcpu and 2GB RAM. We will use first node dedicated for rancher, second node for master and third node as worker.
# -*- mode: ruby -*-
# vi: set ft=ruby :

ENV['VAGRANT_NO_PARALLEL'] = 'yes'
ENV['VAGRANT_DEFAULT_PROVIDER'] = 'libvirt'

Vagrant.configure(2) do |config|

  config.vm.provision "shell", path: "bootstrap.sh"

  NodeCount = 3

  # Kubernetes Nodes
  (1..NodeCount).each do |i|
    config.vm.define "node#{i}" do |node|
      node.vm.box = "generic/ubuntu2004"
      node.vm.hostname = "node#{i}.example.com"
      node.vm.network "private_network", ip: "192.168.122.11#{i}"
      node.vm.provider :libvirt do |v|
        v.memory = 2048
        v.cpus = 2
      end
    end
  end

end
If you don’t use libvirt as the provider, then please use this configuration instead
Copy the above code and save it as Vagrantfile. Now paste the following code in bootstrap.sh file and save:
#!/bin/bash

# Enable ssh password authentication
echo "[TASK 1] Enable ssh password authentication"
sed -i 's/^PasswordAuthentication .*/PasswordAuthentication yes/' /etc/ssh/sshd_config
echo 'PermitRootLogin yes' >> /etc/ssh/sshd_config
systemctl reload sshd

# Set Root password
echo "[TASK 2] Set root password"
echo -e "kubeadmin\nkubeadmin" | passwd root >/dev/null 2>&1
Now, run this command:
vagrant up
Wait for a few minutes. After that, let’s SSH into the nodes
Rancher node: ssh [email protected] (node01)
master node: ssh [email protected] (node02)
Worker node: ssh [email protected] (node03)
The root password is kubeadmin
In all those nodes, we need to install docker as rancher will run in a docker container. First, setup docker in all the nodes, I ran the following commands to setup the docker (use tmux with synchronize panes enabled to run those commands in all nodes at the same time)
{
apt install -y apt-transport-https ca-certificates curl gnupg-agent software-properties-common
curl -fsSL https://download.docker.com/linux/ubuntu/gpg | apt-key add -
add-apt-repository "deb [arch=amd64] https://download.docker.com/linux/ubuntu $(lsb_release -cs) stable"
apt update && apt install -y docker-ce=5:19.03.10~3-0~ubuntu-focal containerd.io
}
Next I will enable insecure registries in all nodes so that the Kubernetes cluster can communicate with local registry on the host machine (we will see how to setup it later). So in all nodes, run the following commands (remember to replace your host IP address here. Keep the port 5000):
cat <<EOF > /etc/docker/daemon.json
{
"insecure-registries" : [ "192.168.1.185:5000" ]
}
EOF
systemctl daemon-reload && systemctl restart docker
Now let’s setup our host machine as a private registry. To do that, in host machine, run the following command which will run a private registry
docker run -d -p 5000:5000 --restart always --name registry registry:2
You can curl to test whether the local registry is up or not.
curl 192.168.1.185:5000/v2/_catalog
Setting up Rancher
Now we will install Rancher in the node01. So, run the following command in node01 to launch the rancher container in detached mode:
docker run --privileged -d --restart=unless-stopped -v /opt/rancher:/var/lib/rancher -p 8080:80 -p 443:443 rancher/rancher
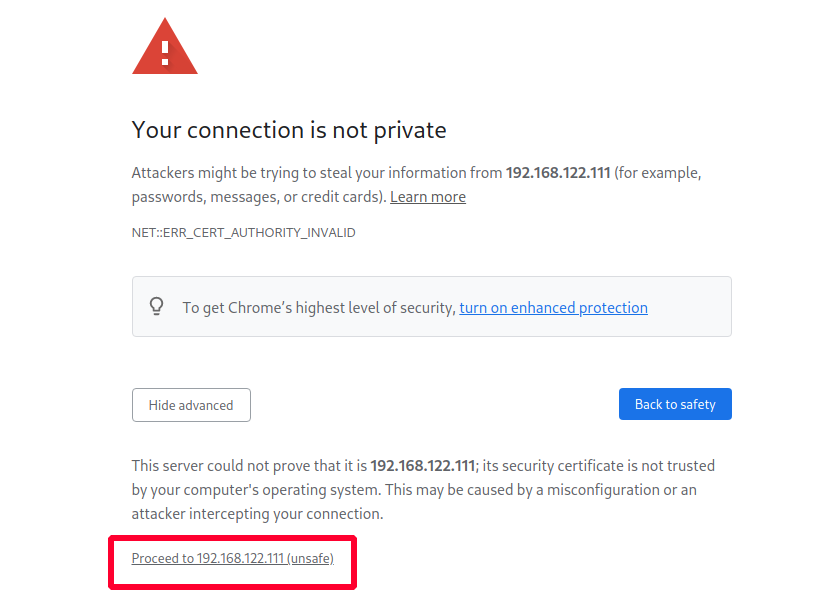
After a minute, from your host machine, browse https://192.168.122.111
You should see a warning page, just ignore and proceed
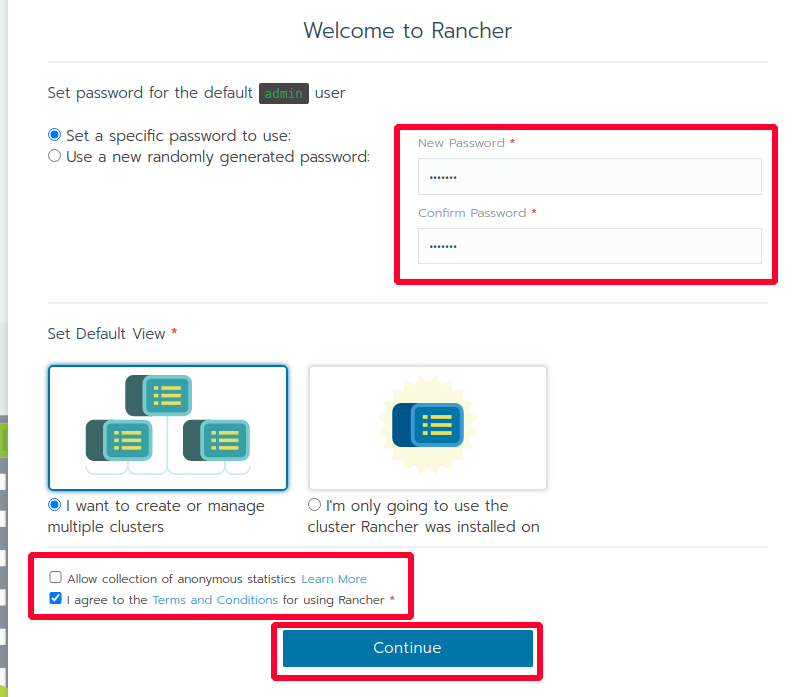
Set a password for user admin when done, click continue.
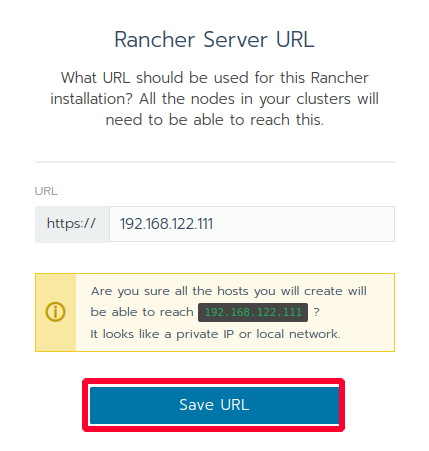
In the following page, you need to set Rancher Server URL, set it to the master server IP. In our case it is 192.168.122.111. Click Save URL
Setup part is done. Now we will use Rancher to deploy local Kubernetes cluster.
Deploy local Kubernetes cluster
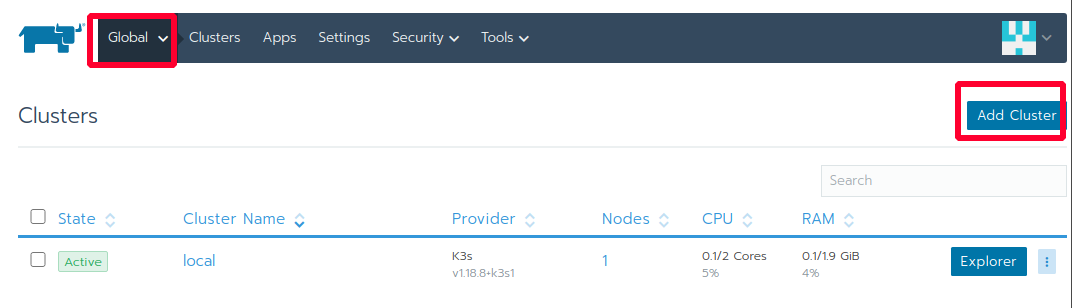
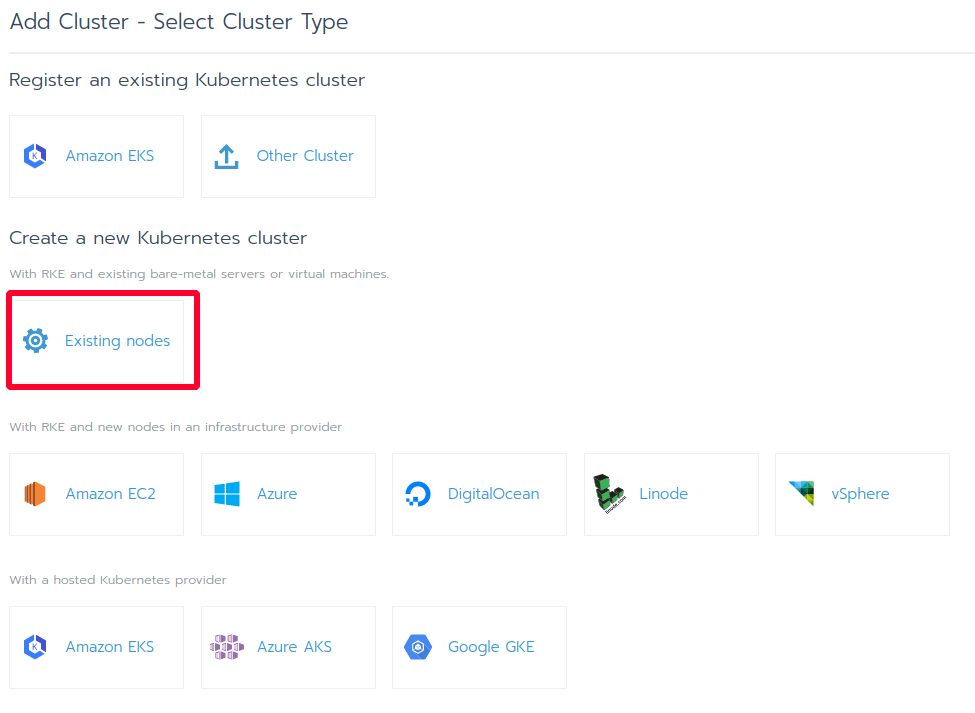
Click Global and click Add Cluster.
Select Existing nodes
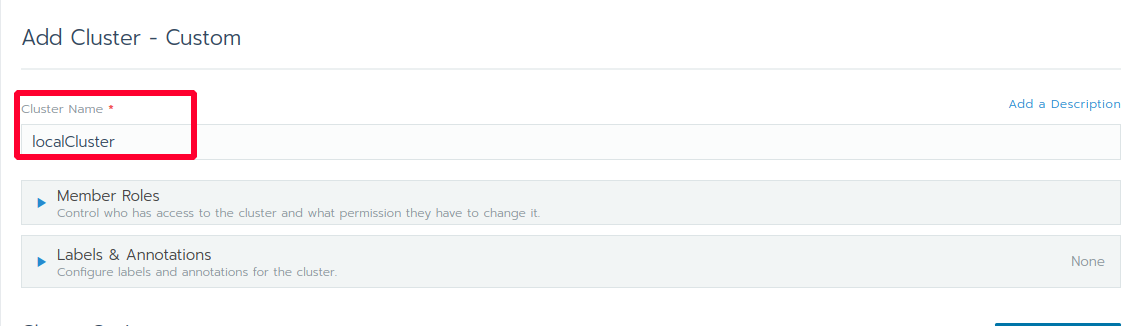
Give your cluster a name and leave everything as default. Click Next.
Now, we will setup master node first. So tick etcd & Control Plane. Untick Worker. Copy the code shown below.
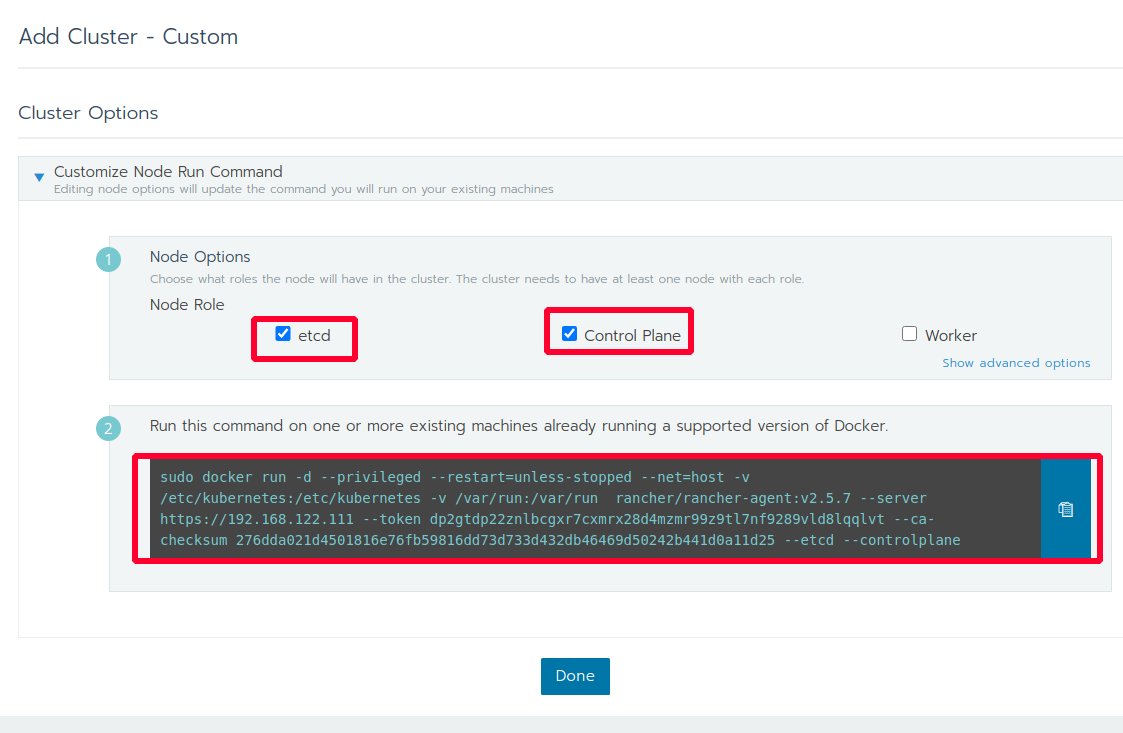
Paste the copied code to node02 and press enter.
Now for the worker node, similarly, go back to the Rancher dashboard, now select only Worker and untick etcd & Control Plane. Grab the code and paste to the node03.
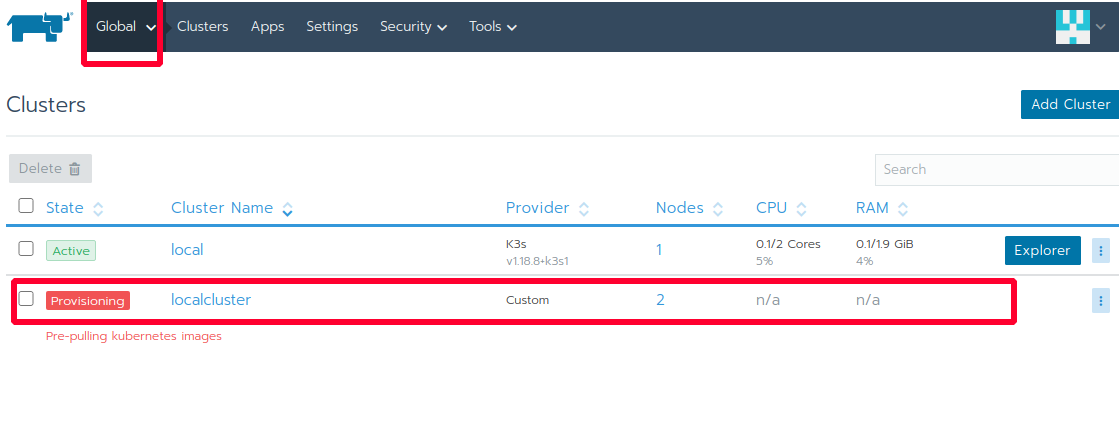
Now if you go back to Global settings, you see our localCluster is provisioning with two nodes (one master & one worker). It will take several minutes. Wait for it to complete. Take a coffee break (also don’t forget to feed your cat 😼)
 After a few minutes, click on the cluster. The cluster should be ready to rock!
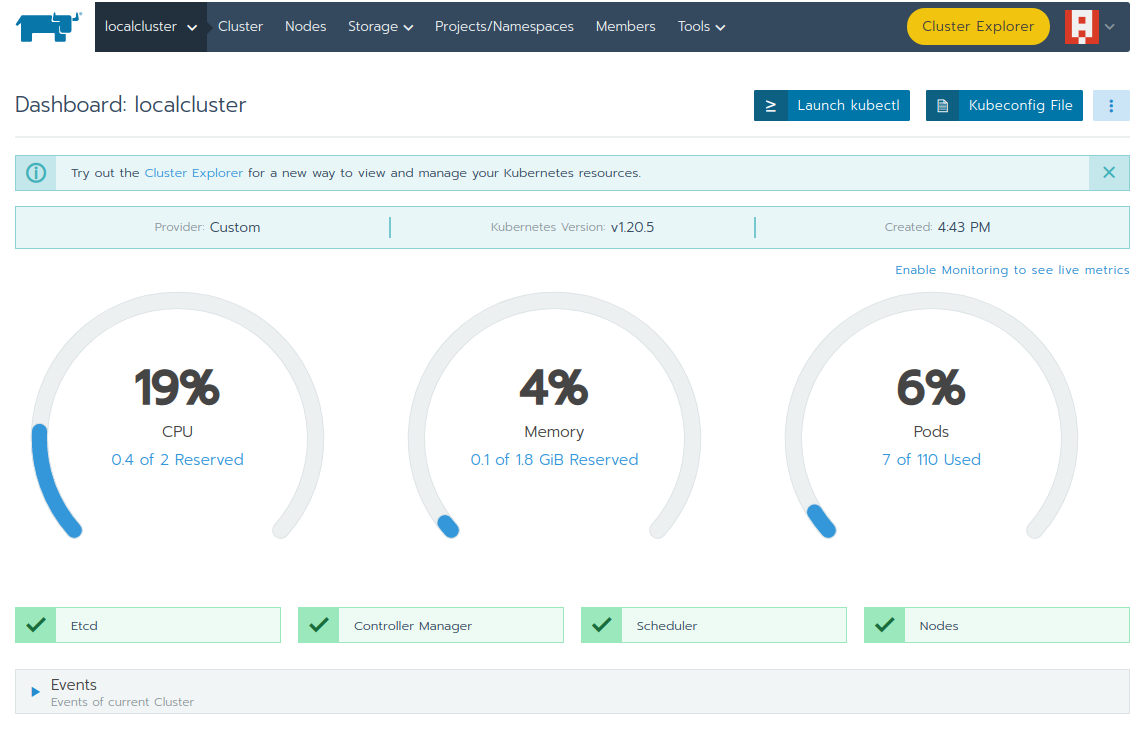
Click the “Kubeconfig File” (right corner) and copy the contents of it. Add the contents in ~/.kube/config file.
Now let’s run a demo pod
kubectl get pods
kubectl run nginx --image=nginx:latest
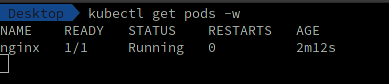
kubectl get pods -w
You should see the pod is running after a few moments.
You can also see this pod in rancher dashboard (Resources > Workloads). From here you can see your running pods, services, deployments and other resources.
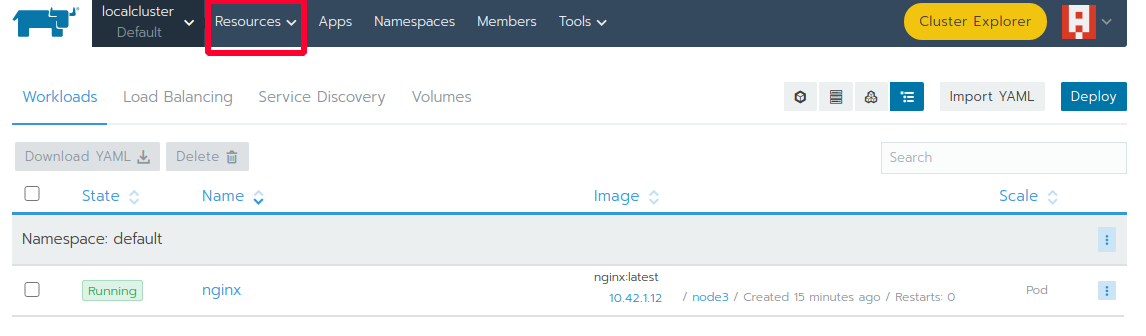
Success✌️ This is how you use Rancher to deploy Kubernetes cluster.