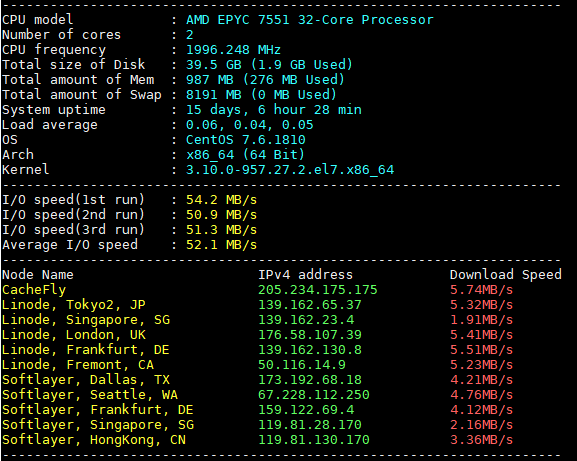
Oracle recently announced two always free instances including other free services, a big move by oracle to provide cloud for everyone. So I created an account and I have been using their free tier instances for two weeks. Great service so far. Here is a benchmark report of one of my free instance (Note: outbound transfer speed is capped to 5 MB).

<img class="size-full wp-image-354 aligncenter" src="/uploads/2019/10/oracle-free-tier-benchmark.png" alt="" width="577" height="461" />

Since Oracle provides public IP for free, I reserved and attached an IP address to my instance. They didn’t charge any penny for IP (at the time of writing) even if you reserved it and don’t attach it to VM. However it took much time for me to understand how to attach reserved IP to the cloud instance. So here I will demonstrate it step by step.
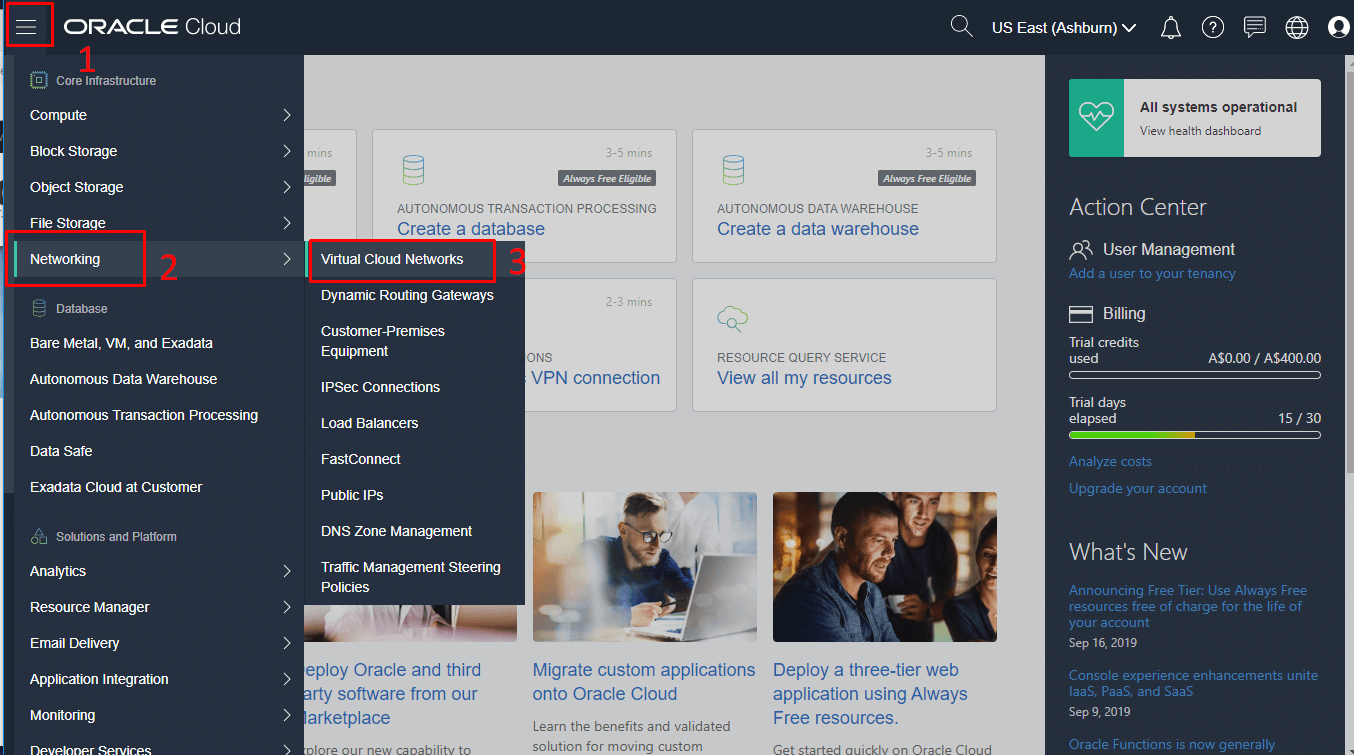
Reserving an IP

To reserve an IP, make sure you are in the same region of your VM instance.  Go to Networking > Virtual Cloud Network

<img class="alignnone size-full wp-image-357" src="/uploads/2019/10/oracle-vm-networks.png" alt="" width="1354" height="755" srcset="/uploads/2019/10/oracle-vm-networks.png 1354w, /uploads/2019/10/oracle-vm-networks-768x428.png 768w" sizes="(max-width: 1354px) 100vw, 1354px" />

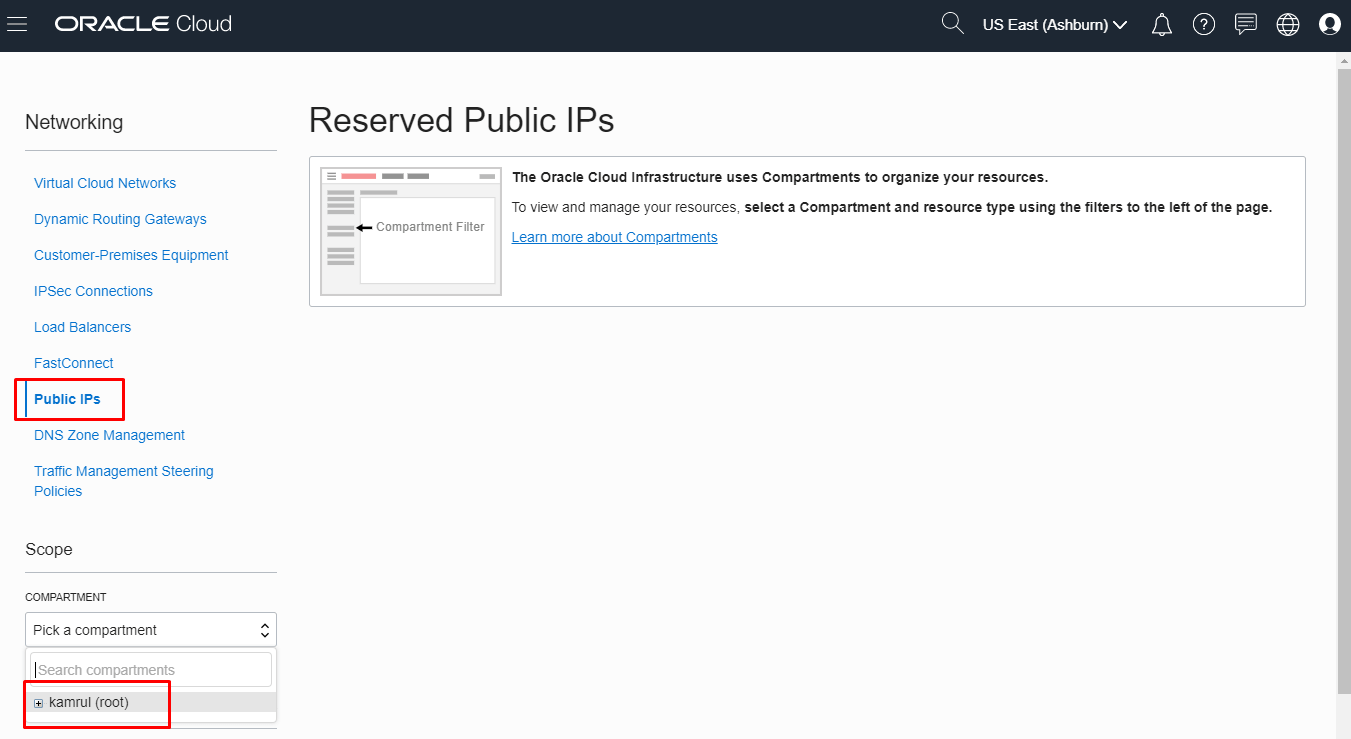
Now click “Public IPs” and select your compartments

<img class="alignnone size-full wp-image-356" src="/uploads/2019/10/oracle-select-compartment.png" alt="" width="1351" height="739" srcset="/uploads/2019/10/oracle-select-compartment.png 1351w, /uploads/2019/10/oracle-select-compartment-768x420.png 768w" sizes="(max-width: 1351px) 100vw, 1351px" />

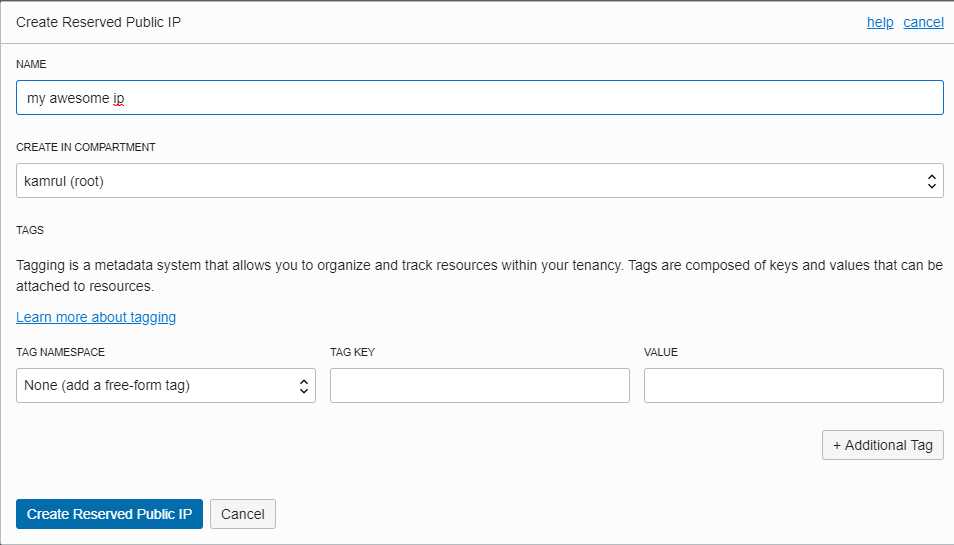
Click “Create Reserved Public IP”. A pop up will appear. Give it a name and just click “Create Reserved Public IP”

<img class="alignnone size-full wp-image-358" src="/uploads/2019/10/oracle-reserve-ip1.png" alt="" width="1341" height="789" srcset="/uploads/2019/10/oracle-reserve-ip1.png 1341w, /uploads/2019/10/oracle-reserve-ip1-768x452.png 768w" sizes="(max-width: 1341px) 100vw, 1341px" />

<img class="alignnone size-full wp-image-359" src="/uploads/2019/10/oracle-reserve-ip2.png" alt="" width="954" height="545" srcset="/uploads/2019/10/oracle-reserve-ip2.png 954w, /uploads/2019/10/oracle-reserve-ip2-768x439.png 768w" sizes="(max-width: 954px) 100vw, 954px" /> <img class="alignnone size-full wp-image-360" src="/uploads/2019/10/oracle-reserve-ip3.png" alt="" width="1898" height="851" srcset="/uploads/2019/10/oracle-reserve-ip3.png 1898w, /uploads/2019/10/oracle-reserve-ip3-768x344.png 768w" sizes="(max-width: 1898px) 100vw, 1898px" />

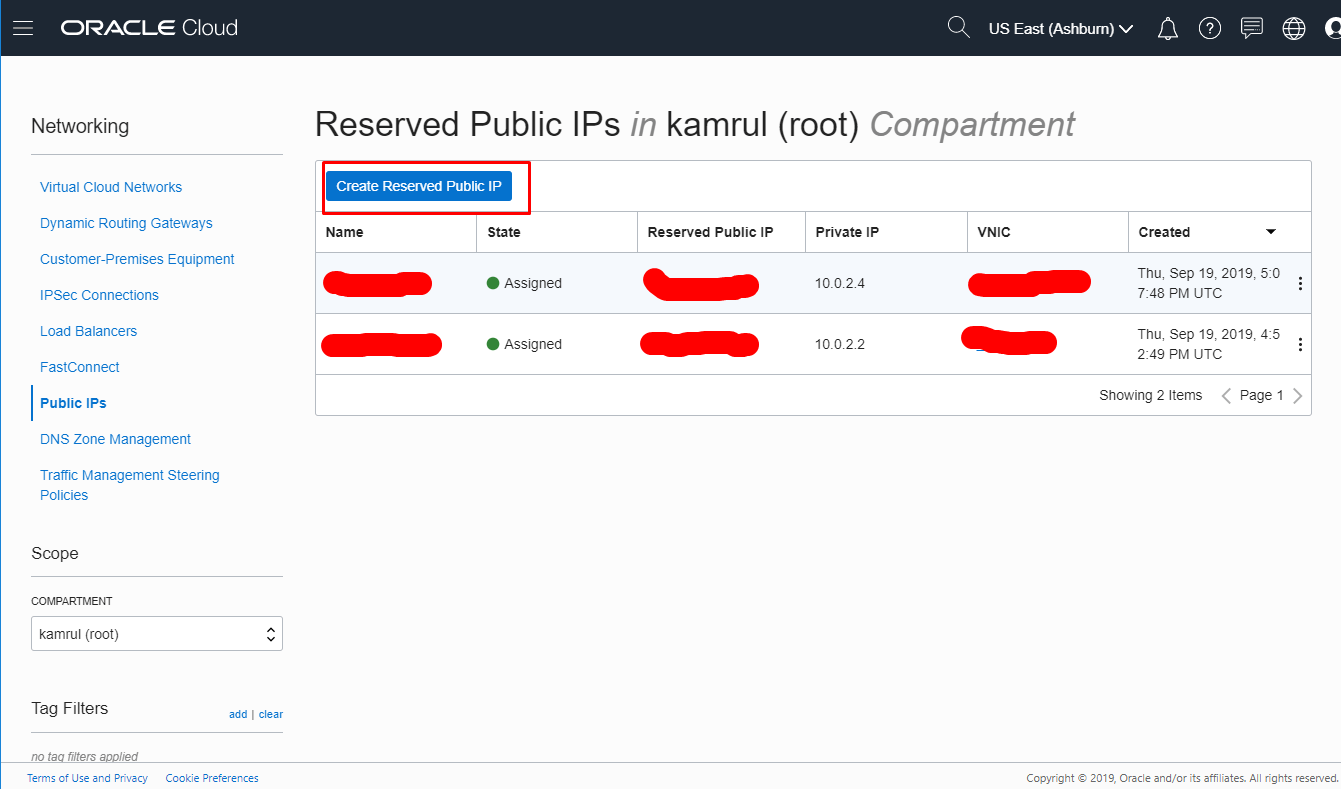
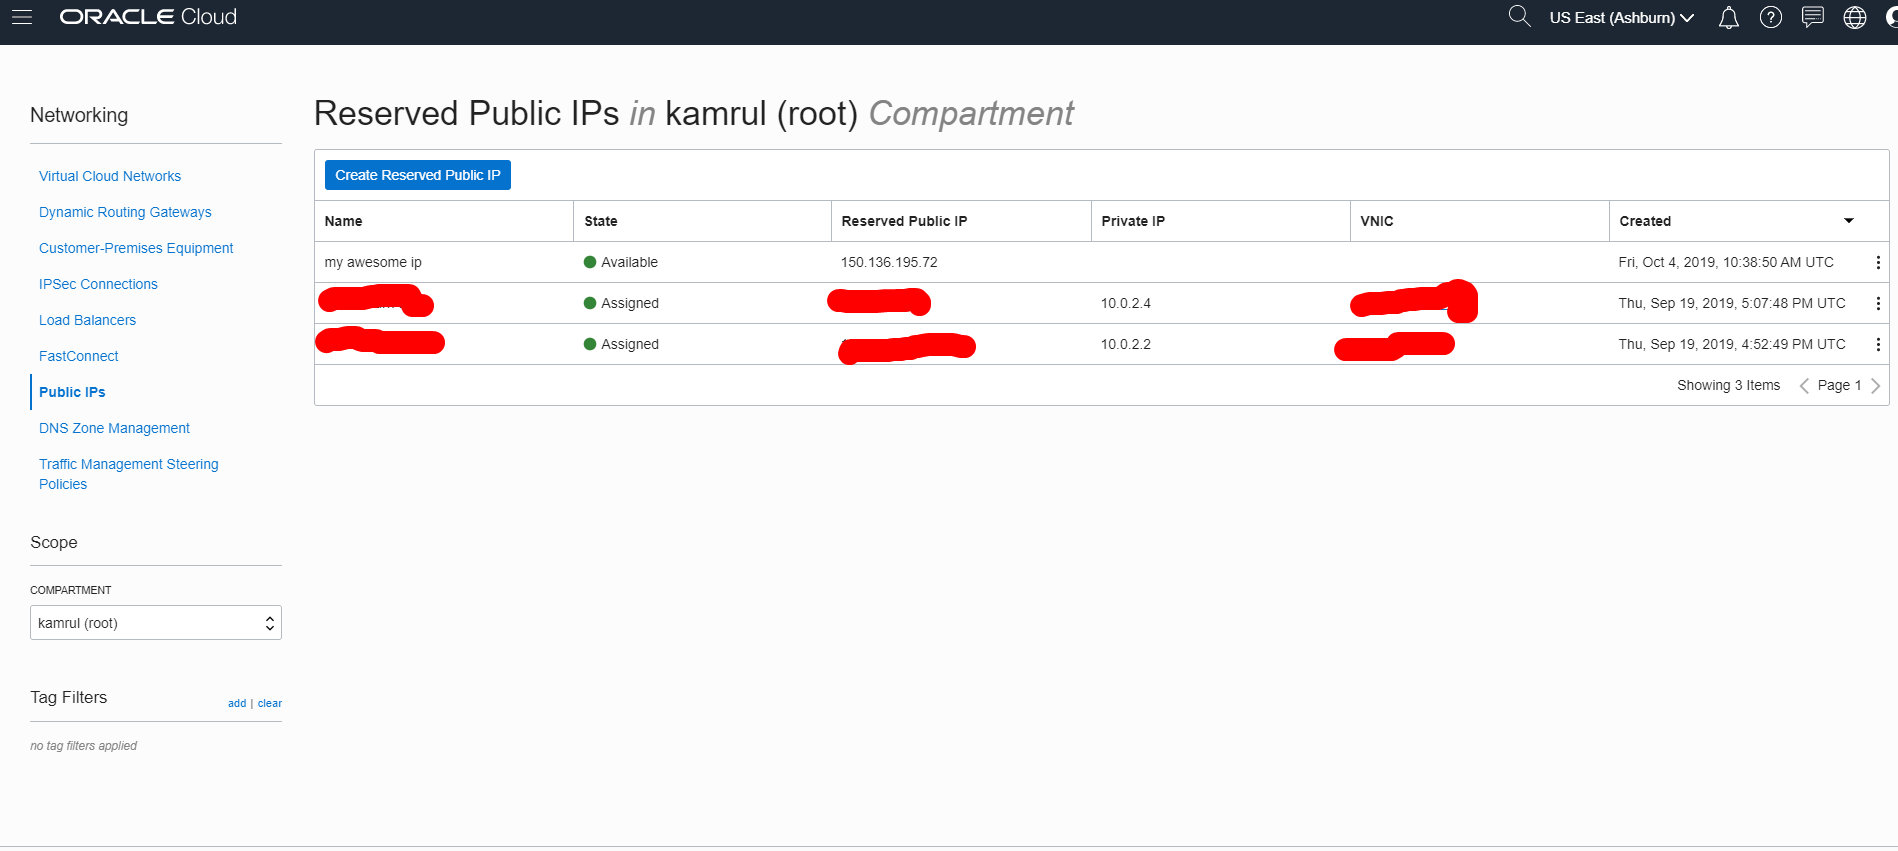
We just reserved an IP for our instance. Now let’s attach that IP to our instance.

Attaching IP to instance

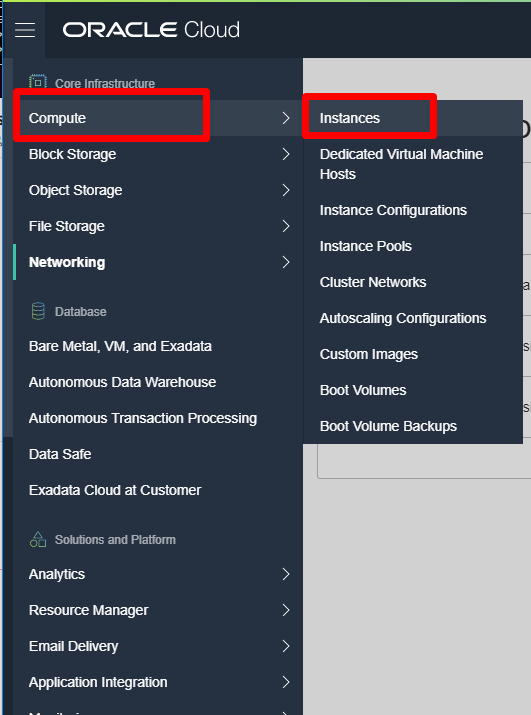
Go to “Compute” > “Instances”
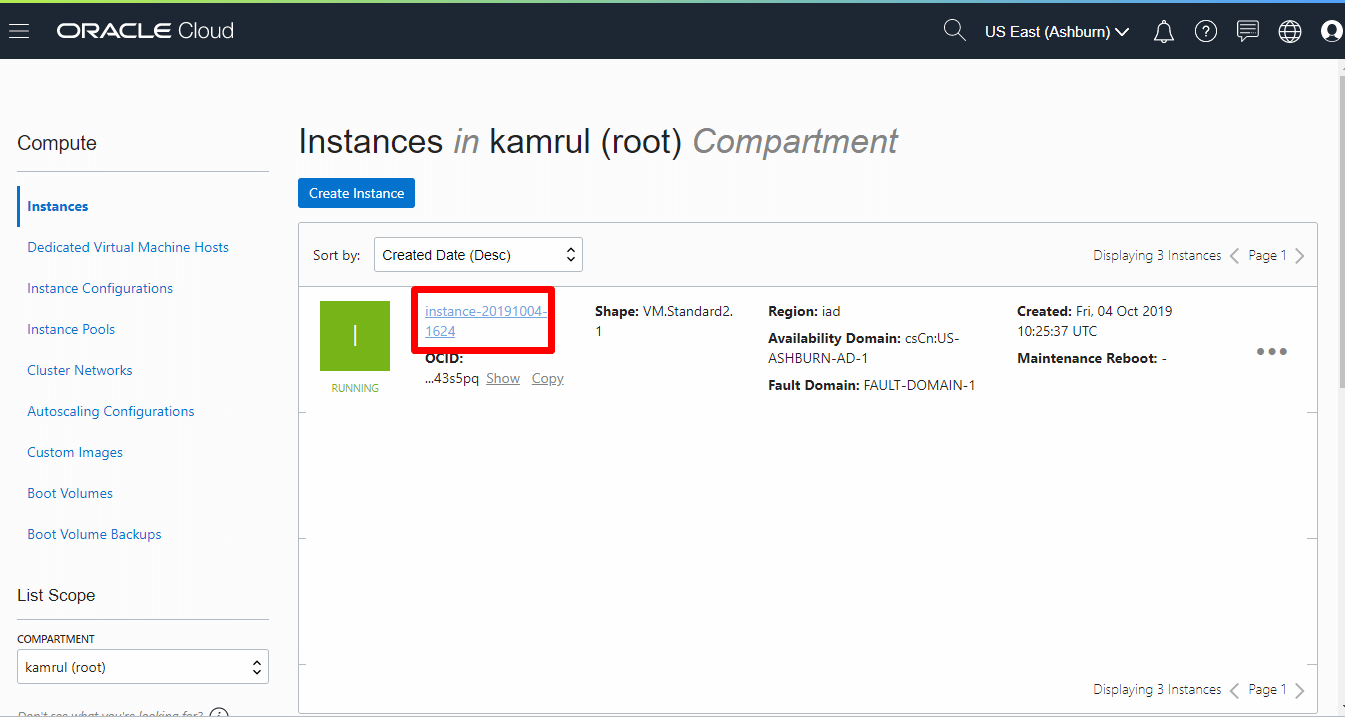
<img class="alignnone size-full wp-image-361" src="/uploads/2019/10/oracle-ip-attach1.png" alt="" width="531" height="715" />

Select your VM

<img class="alignnone size-full wp-image-362" src="/uploads/2019/10/oracle-ip-attach2.png" alt="" width="1345" height="717" srcset="/uploads/2019/10/oracle-ip-attach2.png 1345w, /uploads/2019/10/oracle-ip-attach2-768x409.png 768w" sizes="(max-width: 1345px) 100vw, 1345px" />

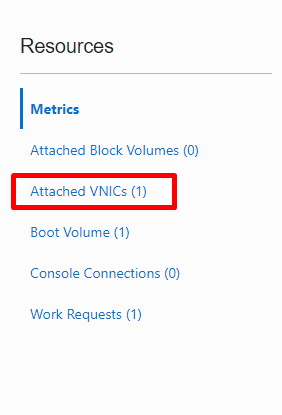
Select “Attached VNCs” from left menu
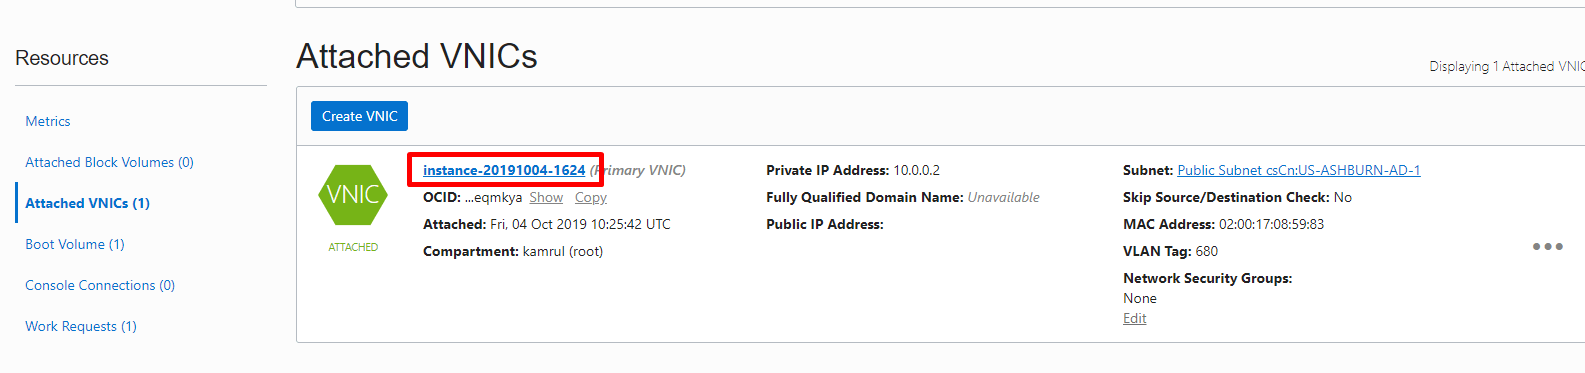
<img class="alignnone size-full wp-image-363" src="/uploads/2019/10/oracle-ip-attach3.png" alt="" width="282" height="415" />

Click on your VNC

<img class="alignnone size-full wp-image-364" src="/uploads/2019/10/oracle-ip-attach4.png" alt="" width="1585" height="373" srcset="/uploads/2019/10/oracle-ip-attach4.png 1585w, /uploads/2019/10/oracle-ip-attach4-768x181.png 768w" sizes="(max-width: 1585px) 100vw, 1585px" />

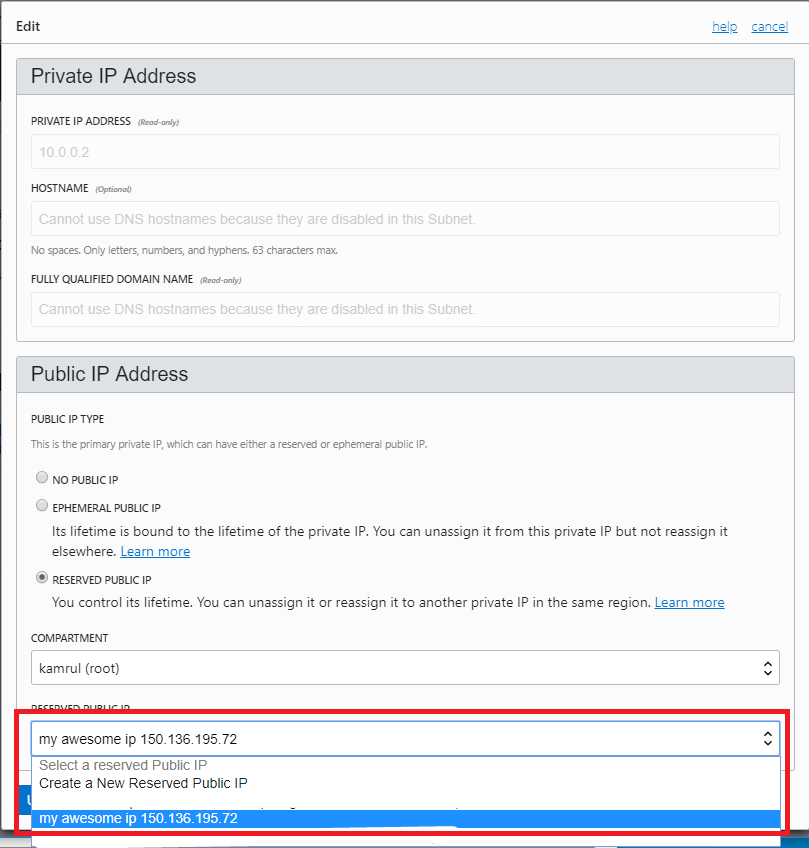
Now again from left sidebar, select “IP Addresses” and edit the option

<img class="alignnone size-full wp-image-365" src="/uploads/2019/10/oracle-ip-attach5.png" alt="" width="1612" height="296" srcset="/uploads/2019/10/oracle-ip-attach5.png 1612w, /uploads/2019/10/oracle-ip-attach5-768x141.png 768w" sizes="(max-width: 1612px) 100vw, 1612px" />

Select your reserved IP from dropdown menu and click “Update”

<img class="alignnone wp-image-378 size-full" src="/uploads/2019/10/oracle-ip-attach6.png" alt="" width="809" height="848" srcset="/uploads/2019/10/oracle-ip-attach6.png 809w, /uploads/2019/10/oracle-ip-attach6-768x805.png 768w" sizes="(max-width: 809px) 100vw, 809px" /> <img class="alignnone size-full wp-image-367" src="/uploads/2019/10/oracle-ip-attach7.png" alt="" width="807" height="830" srcset="/uploads/2019/10/oracle-ip-attach7.png 807w, /uploads/2019/10/oracle-ip-attach7-768x790.png 768w" sizes="(max-width: 807px) 100vw, 807px" />

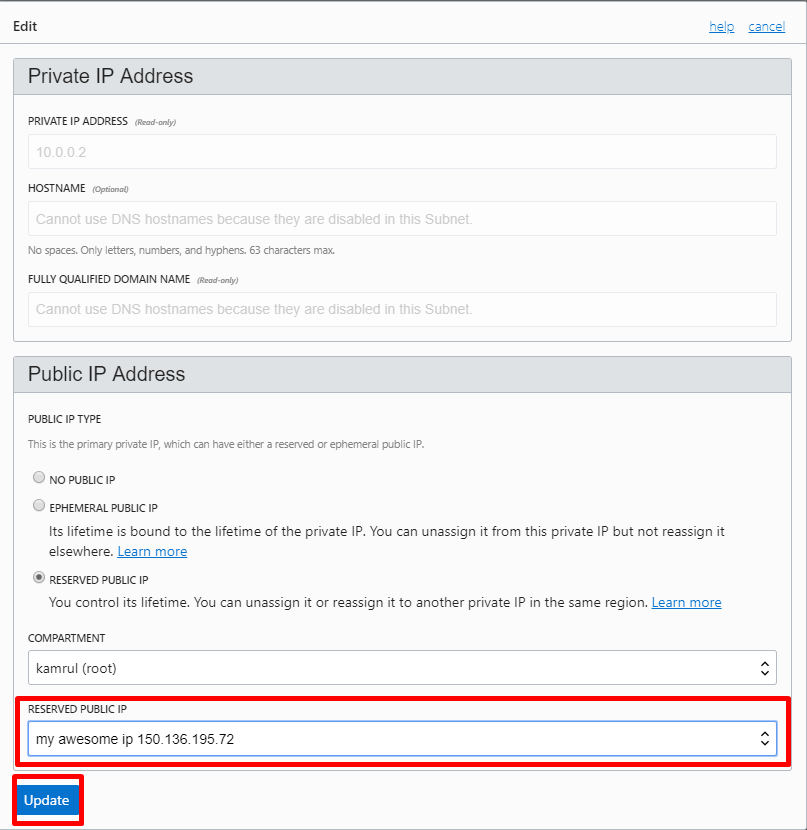
Success!! You have just attached your reserved IP to the VM instance.

<img class="alignnone size-full wp-image-369" src="/uploads/2019/10/oracle-ip-attach8.png" alt="" width="1348" height="251" srcset="/uploads/2019/10/oracle-ip-attach8.png 1348w, /uploads/2019/10/oracle-ip-attach8-768x143.png 768w" sizes="(max-width: 1348px) 100vw, 1348px" />