In this guide we will see how to create, destroy & assign floating IP to droplets with DigitalOcean API. First thing first, if you don’t have DigitalOcean account, simply click on this link and create an account. You will get 50$ credit for 30 days. Great opportunity to try out DigitalOcean.
If you are already familiar with DigitalOcean, then you know every time we want to manage a droplet, we need to login the website, make some few clicks. What if we could do all the tasks within a second? We will save time and effort.
For this automation process, we will use Python 3. Python will handle the tedious tasks behind the scene. That being said, let’s start!
Before continue, make sure that Python 3 is already installed on you machine. If not, then please install it first. There are plenty of guides out there.
Obtain a token#
We need a token in order to directly communicate with your DigitalOcean account. DON’T disclose your token anywhere else. It holds private information of your account like name and password. So keep it secret.
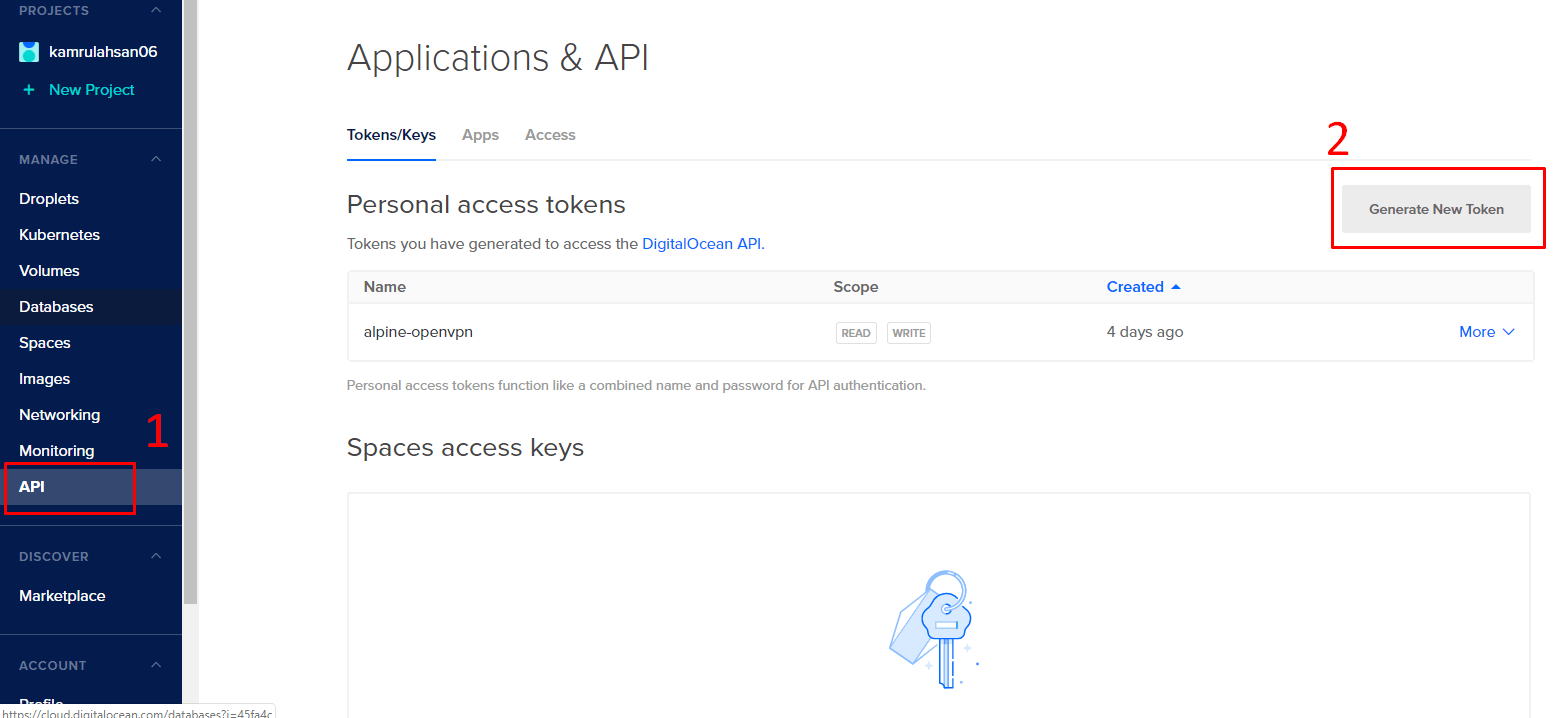
To generate a token, login to DigitalOcean, click on “API”. Then click “Generate New Token”.
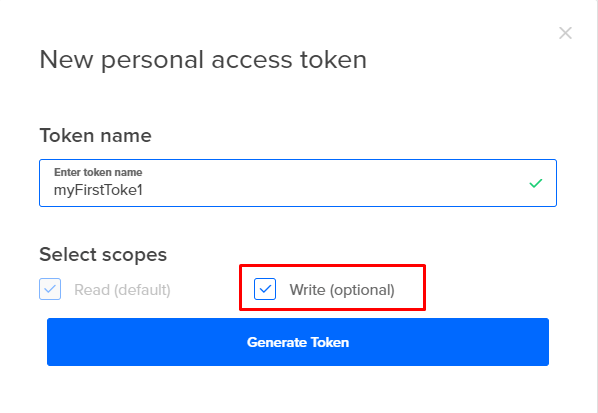
Give your token a name. Make sure to ‘write’ scope is selected and click generate.
You will see a token has been generated. Save that token.
Generate SSH Key#
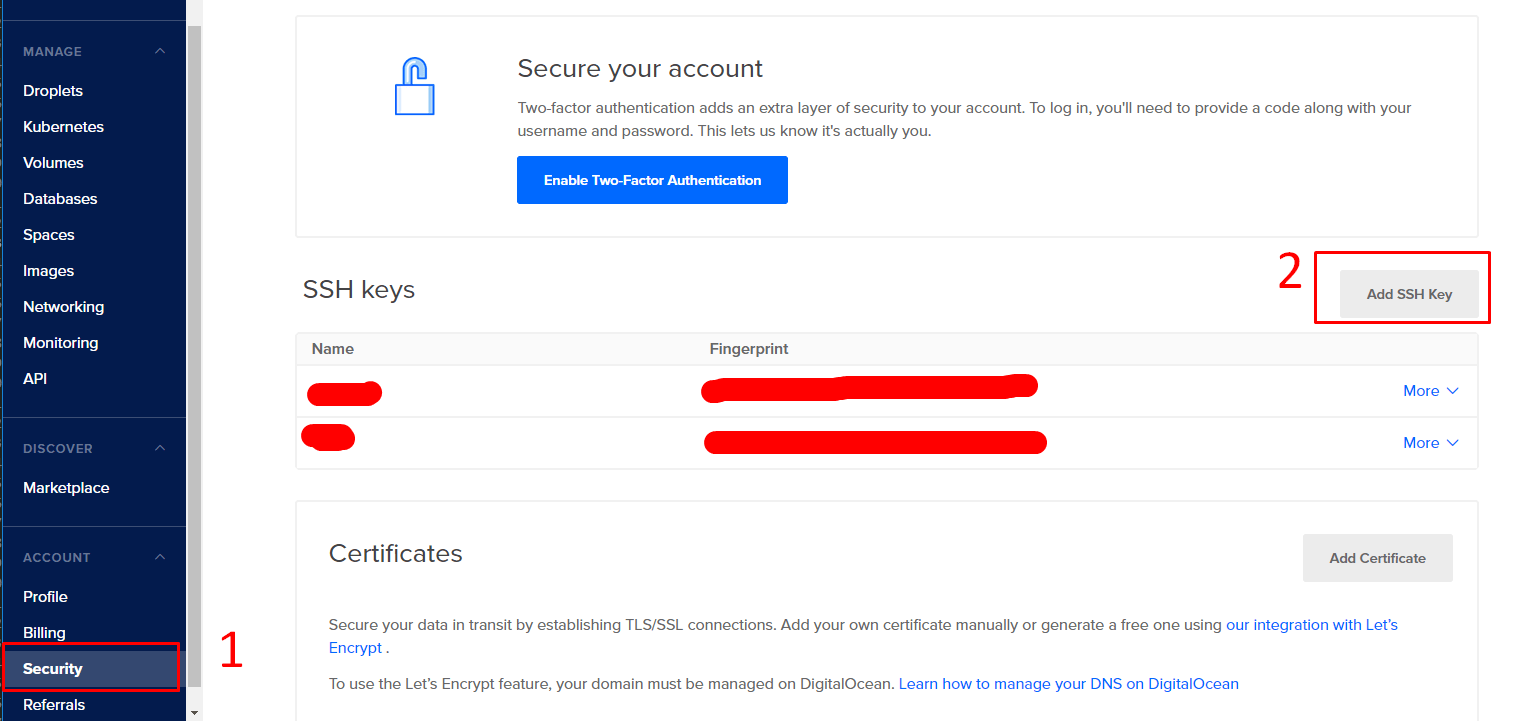
We need a SSH key in order to login with our droplets. You can use password based login but key based login is more secure. To generate key, go to “Security” and click “Add SSH Key”
Follow the steps provided by DigitalOcean in order to create the SSH key.
Get SSH Key ID#
We need the SSH key ID for API call. To obtain it, open up your terminal and execute below code. Make sure to replace your api:
1
|
curl -X GET -H "Content-Type: application/json" -H "Authorization: Bearer your-api-code-here" "https://api.digitalocean.com/v2/account/keys"
|
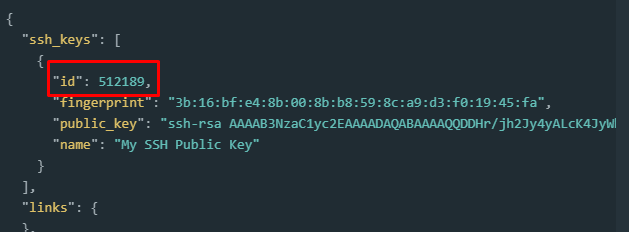
In response, you will get the ssh_keys with id. Note that id.
Create droplet via API#
Create a file do_api.py and paste the following code. DON’T worry, I will explain the code line by line.
 1
 2
 3
 4
 5
 6
 7
 8
 9
10
11
12
13
14
15
16
17
18
19
20
21
22
23
24
25
26
27
28
29
30
31
32
33
34
35
36
37
|
import json             #We need json library in order to work with json data
import requests         #The requests library will handle all the api requests and responses
from time import sleep  #Our code need some sleep before doing another job (code also needs sleep eh?)

api_token = 'your-api-key-here'  #Paste the api code here
droplet_size = "s-1vcpu-1gb"        #Define the droplet plan. We selected 5$/mo (lowest plan). Full list can be found here https://do.co/2kInA8L
headers = {'Content-Type': 'application/json', 'Authorization': f'Bearer {api_token}'}  # Header information that will be sent to the digitalocean in order to authenticate user

def get_droplet_info():
    api_url = 'https://api.digitalocean.com/v2/droplets'  #Url that will be used to call API request
    response = requests.get(api_url, headers=headers)     #Get the response from API after sending request
    if response.status_code == 200:                       #If response is success, show the response. Otherwise return nothing
        print(json.loads(response.content.decode('utf-8')))
    else:
        return None

# get_droplet_info()   #We comment out this function call since we don't have any existing droplet. If you have, you can call this function in order to get droplet information

##Creating droplet
def create_droplet(name, region, image_id, ssh_keys):
    # Creating droplet
    api_droplet_url = 'https://api.digitalocean.com/v2/droplets'  #Url that will be used for API request
    droplet_create_info = {"name":name,"region":region,"size":f'{droplet_size}',"image": image_id, "ssh_keys":[ssh_keys]}  #Gathering necessary information
    response = requests.post(api_droplet_url, headers=headers, json=droplet_create_info) #Sending the gathered information with post request to create droplet
    response_data = response.json() #Preparing the response as json data
    droplet_id = response_data["droplet"]["id"]     #Storing the newly created droplet id from response_data
    print(f"Droplet created successfully. Droplet id {droplet_id}")  #Note that droplet id. We will need that later.
'''

Now we will call the function. Please note that we need to pass below parameters:
-1st parameter: droplet name. It can be any name
-2nd parameter: region, where you want to create your droplet. List of region: https://do.co/2kI8H6p
-3rd parameter: image id of the distro. Full list can be found here https://slugs.do-api.dev/  (In 'Distro Images' tab)
-4th parameter: Your ssh_key id

'''
create_droplet("my-droplet", "nyc1", 50903182, 25323501)
|
After executing the above script, you will see your new droplet has been created.

Assign floating IP to droplet via API#
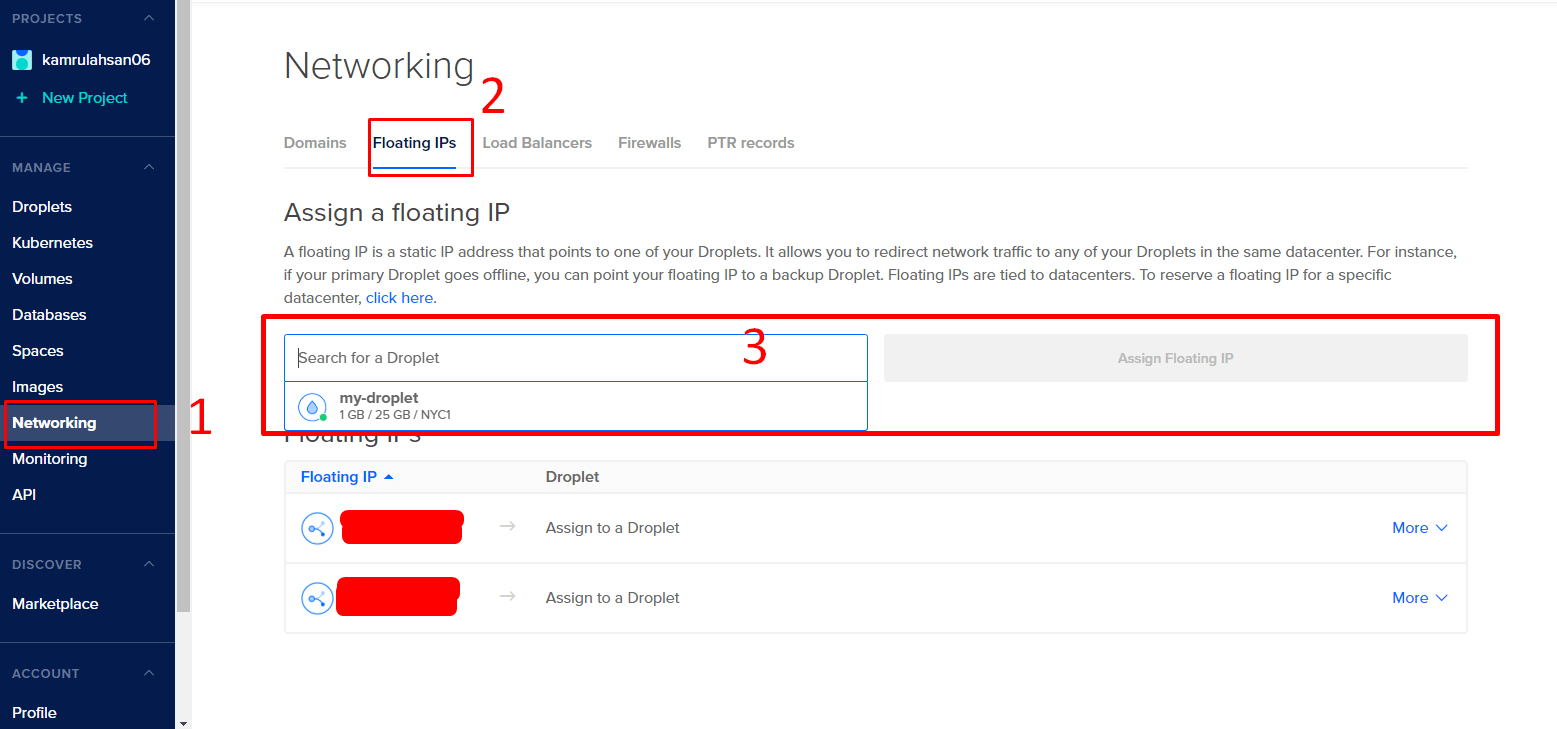
First of all, we need to reserve a floating IP in order to assign it to droplet. To do that, go to “Network” > “Floating IPs” tab and assign a floating IP with an existing droplet.
Now that IP is for you. Even if you don’t use it with any droplet. It has reserved. However, a small charge will be applied in each hour. See DigitalOcean pricing for more info.
Now let’s assign that IP to our newly created droplet via API. If your IP already assigned, then unassign it first. We will assign it via API. Note your preserved IP address.
Add the below function to our existing code.
 1
 2
 3
 4
 5
 6
 7
 8
 9
10
11
|
--snip--
#create_droplet("my-droplet", "nyc1", 50903182, 25323501)   # We comment it out this function call as we already have a droplet. If we don't comment it, then another droplet will be created. So comment it out first.

##Assigning floating ip
def assign_floating_ip(droplet_id, floating_ip):
    api_droplet_action_url = f'https://api.digitalocean.com/v2/floating_ips/{floating_ip}/actions'    #Url that will be used for API request
    assign_ip = {"type":"assign","droplet_id":droplet_id}   #Gathering necessary information
    response = requests.post(api_droplet_action_url, headers=headers, json=assign_ip)   #Sending the gathered information with post request to assign IP
    print('Floating IP added successfully!')

assign_floating_ip(123456, '1.2.3.4')   # Provide your droplet id and reserved floating IP address here
|
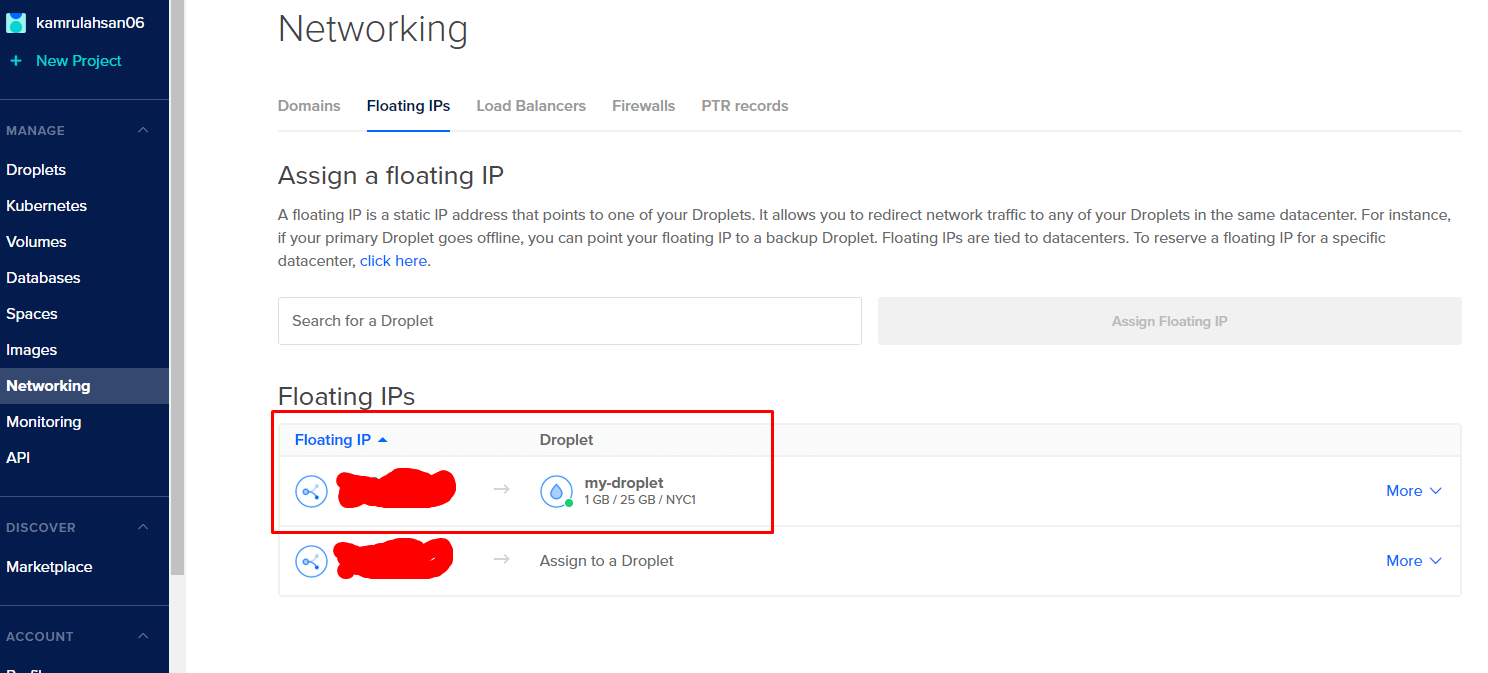
Result:
Delete droplet via API#
To delete droplet via API, we need droplet id only. We will use the following function:
1
2
3
4
5
6
7
8
|
#assign_floating_ip(123456, '1.2.3.4') # We comment it out this function call as we already have a assigned floating ip to droplet
##Delete droplet
def delete_droplet(droplet_id):
    droplet_delete_action_url = f'https://api.digitalocean.com/v2/droplets/{droplet_id}'    #Url that will be used for API request
    response = requests.delete(droplet_delete_action_url, headers=headers)   #Sending the gathered information with post request to assign IP
    print('Droplet deleted successfully!')

delete_droplet(123456)  #Provide the droplet id
|
That’s it. You now know how to manage droplet using API.