There are a lot of password management solutions out there but to me, it is always a good idea to manage passwords on-premises. By using bitwarden_rs, you can store all your secret info (password, note, two-factor authentication, credit card info) to your own server, even in your tiny raspberry pi .
bitwarden_rs is an unofficial project of bitwarden which is written in Rust. The official self hosted bitwarden package needs minimum 2 GB ram in order to operate. However, bitwarden_rs needs only 10MB ram and it doesn’t need much cpu usage! More info in reddit.
In this tutorial we will setup bitwarden_rs to google’s always free tier instance running Debian 10. You can follow the same procedure to any server.
Setting up docker & docker-compose
bitwarden_rs needs docker in order to run. So if you don’t have docker & docker-compose installed in your server, please install those first.
curl -fsSL https://get.docker.com -o get-docker.sh
sh get-docker.sh
#Installing docker-compose (https://docs.docker.com/compose/install/)
sudo curl -L "https://github.com/docker/compose/releases/download/1.25.4/docker-compose-$(uname -s)-$(uname -m)" -o /usr/local/bin/docker-compose
sudo chmod +x /usr/local/bin/docker-compose
#Adding current user to docker group
sudo usermod -aG docker $USER
exit
Log back to the server again.
Setting up dns & certificates
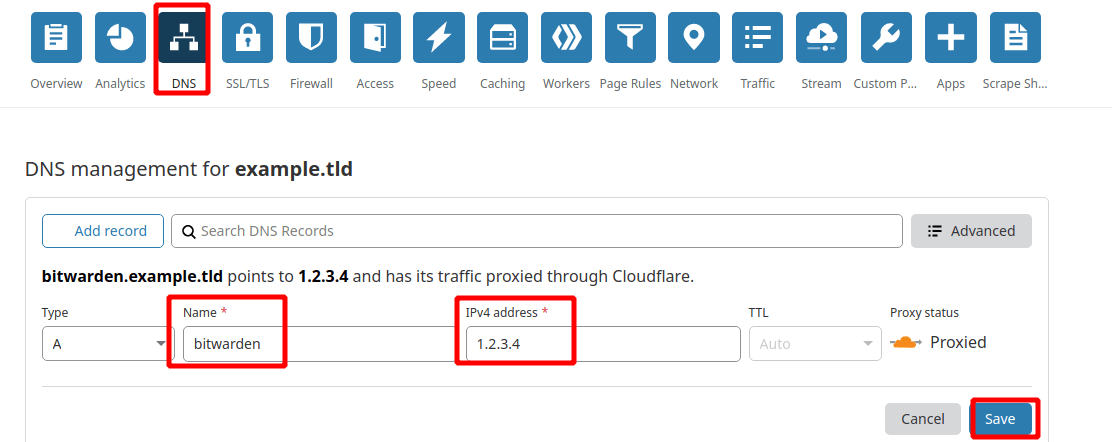
We will setup a dns record to our domain so that we can visit bitwarden_rs admin panel like this: https://bitwarden.example.tld
First, please create a subdomain/domain which points to your server’s IP address. In my case, I am using cloudflare to do that job
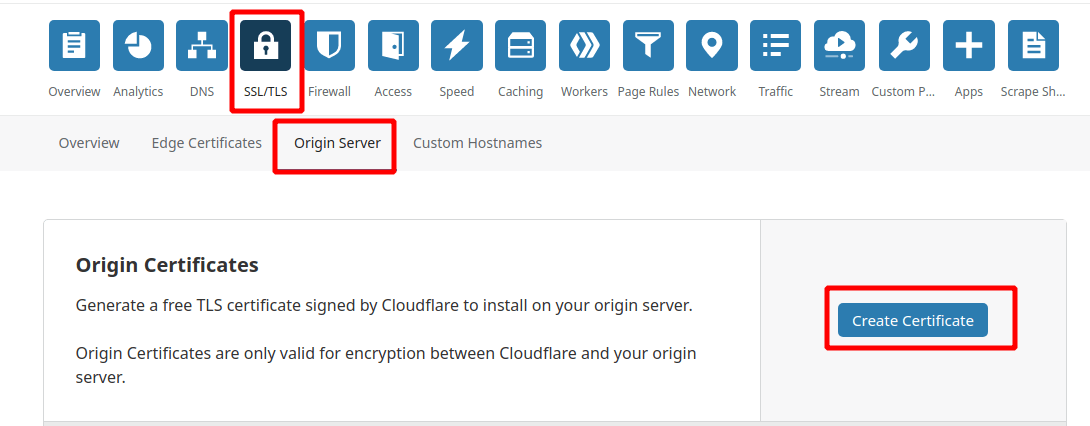
Next, I will setup SSL for this domain. Here I will use cloudflare’s free SSL. However, you can use Let’s encrypt’s free SSL also.
If you use cloudflare & wanted to use cloudflare’s free SSL, please follow the below steps in order to generate certificate and private key.
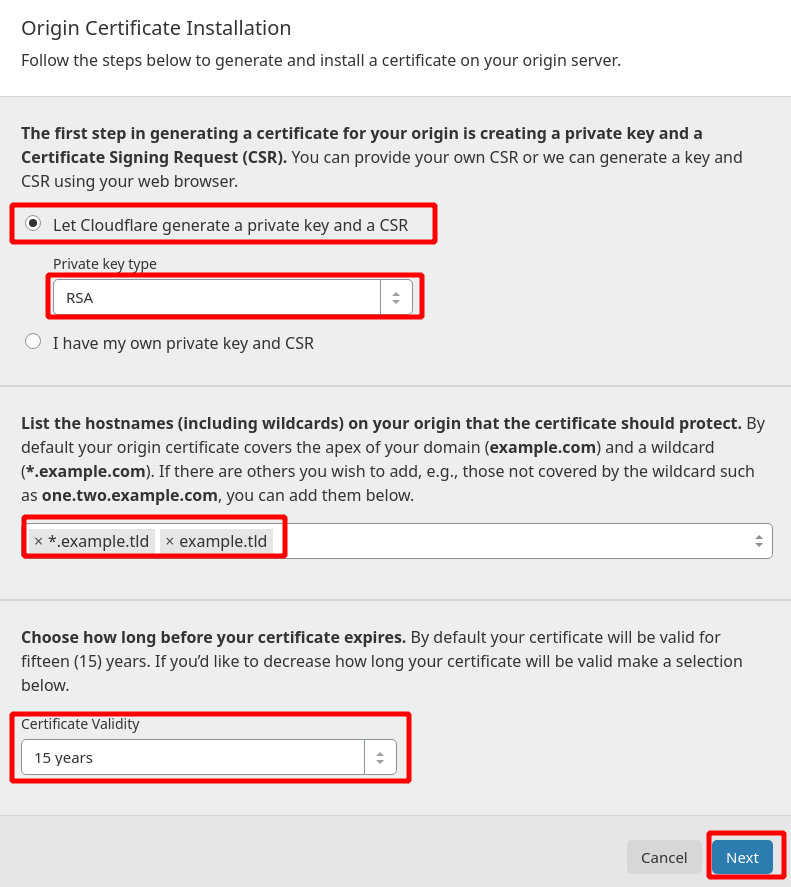
Please go to SSL/TLS tab and click Origin Server. Now create certificate and key for the domain:
Now copy the generated key and create a new text file and paste the code. Save as **key.pem **(make sure no .txt extension at the end).
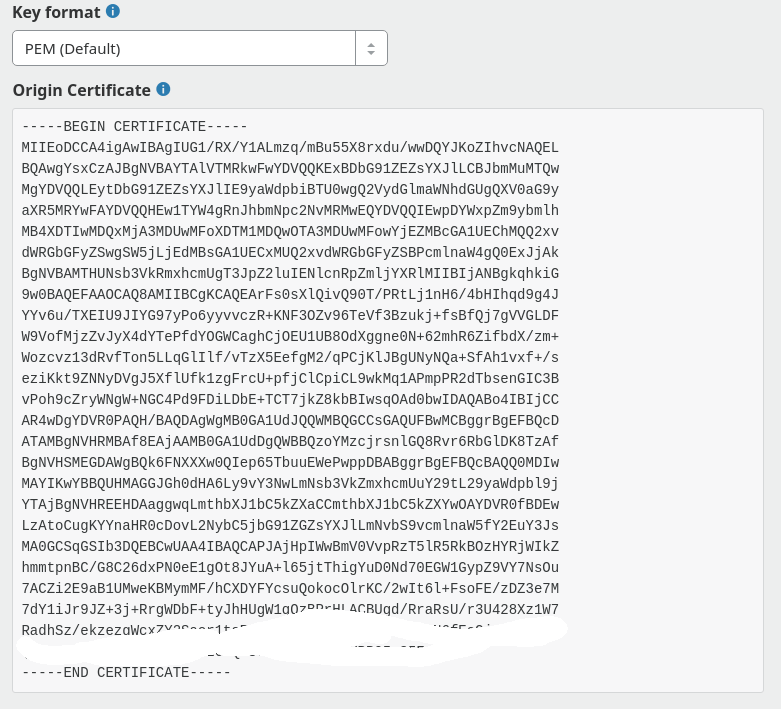
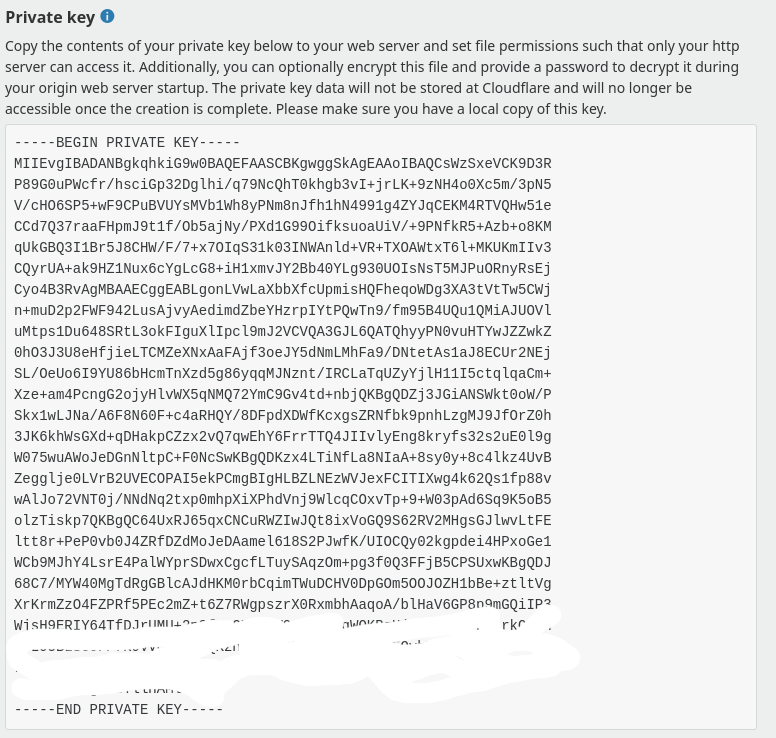
Now again, copy the generated private key and create a new text file and paste the code. Save as **fullchain.pem **(make sure no .txt extension at the end also).
Installing bitwarden_rs in server
Now go back to the server and create a directory within your home directory
mkdir -p ~/bitwarden_rs/ssl
cd ~/bitwarden_rs/ssl
Now transfer key.pem and fullchain.pem files to the ssl directory.
Now go back to the bitwarden_rs directory and create a file named docker-compose.yml
cd ~/bitwarden_rs
nano docker-compose.yml
Open the file with any text editor you like (I used nano) and paste the following code:
version: '3'

services:
 bitwarden:
  image: bitwardenrs/server
  restart: always
  volumes:
      - ./bw-data:/data
      - ./ssl:/ssl
  ports:
    - 443:80
  environment:
   ROCKET_TLS: '{certs = "/ssl/fullchain.pem", key = "/ssl/key.pem"}'
   LOG_FILE: '/data/bitwarden.log'
   SIGNUPS_ALLOWED: 'true'
   DOMAIN: 'https://bitwarden.example.tld'
Change DOMAIN: ‘https://bitwarden.example.tld’ to your domain name. Save and exit.
Now that we have our docker-compose.yml file ready, let’s run it (make sure that you are in bitwarden_rs folder)
docker-compose up -d
The application will start in a few seconds and it will be detached (-d flag) in order to run in background.
Visit https://bitwarden.example.tld. You should see that page. Means your self hosted password management service is ready!
If you need to stop the service
docker-compose stop
If you want to delete the service
docker-compose down
Please visit bitwarden_rs wiki for more info.