In OpenLiteSpeed web server, setting up a SSL certificate for a domain is a bit tricky. In this article I will show how to setup Cloudflare’s free SSL certificate for a domain name. Before we begin, make sure that your domain is using Cloudflare’s DNS.
Getting certificate from Cloudflare
-
Login to your Cloudflare dashboard and select your domain.
-
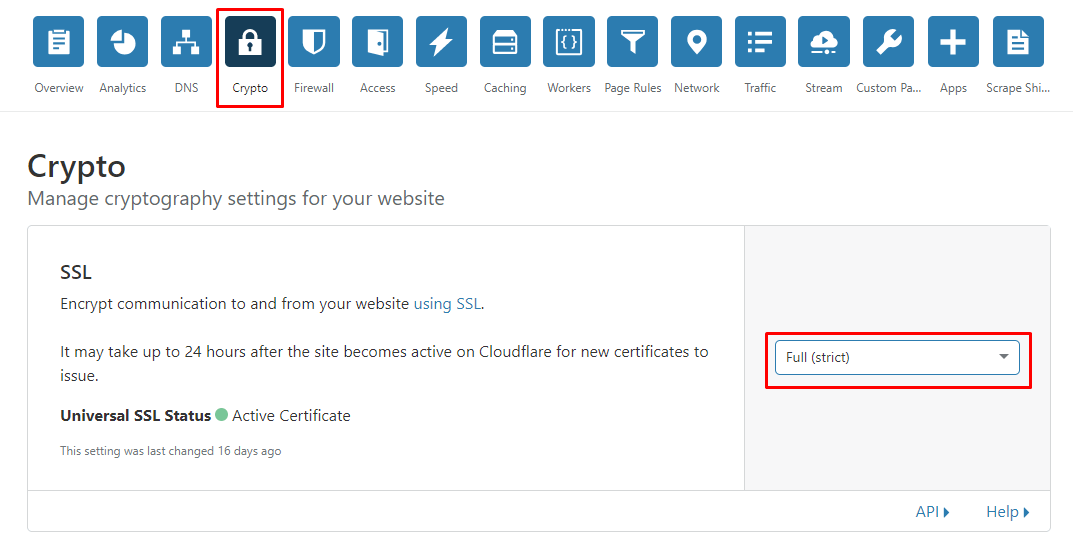
Click on “Crypto” tab and within SSL settings, select “Full (strict)”
- Scroll down a bit and within “Origin Certificates” settings, click “Create Certificate”

-
A pop up window will open. Under the “List the hostnames”, you will see your domain name. If you want to host multiple domains in your web server, then you can also add those domains in that field. Make sure that certificate validity is set to 15 years. Now click next. You will see the certificate file and along with key file that has been generated according to your domain name. We need that certificate file and key file later for the web server.
-
Do not close the window and copy the contents of the “Origin Certificate” box. Create an empty file named “ssl.pem” and paste the copied contents within that file. Follow the similar step for “Private key” and save the file as “ssl.key”
Our work in Cloudflare is done.
Setup Web Server to use generated certificates
First, transfer those .pem and .key files to /usr/local/lsws/conf/cert directory. Now to use those files in our Web Server, we need to configure the SSL settings for port 443 listener.
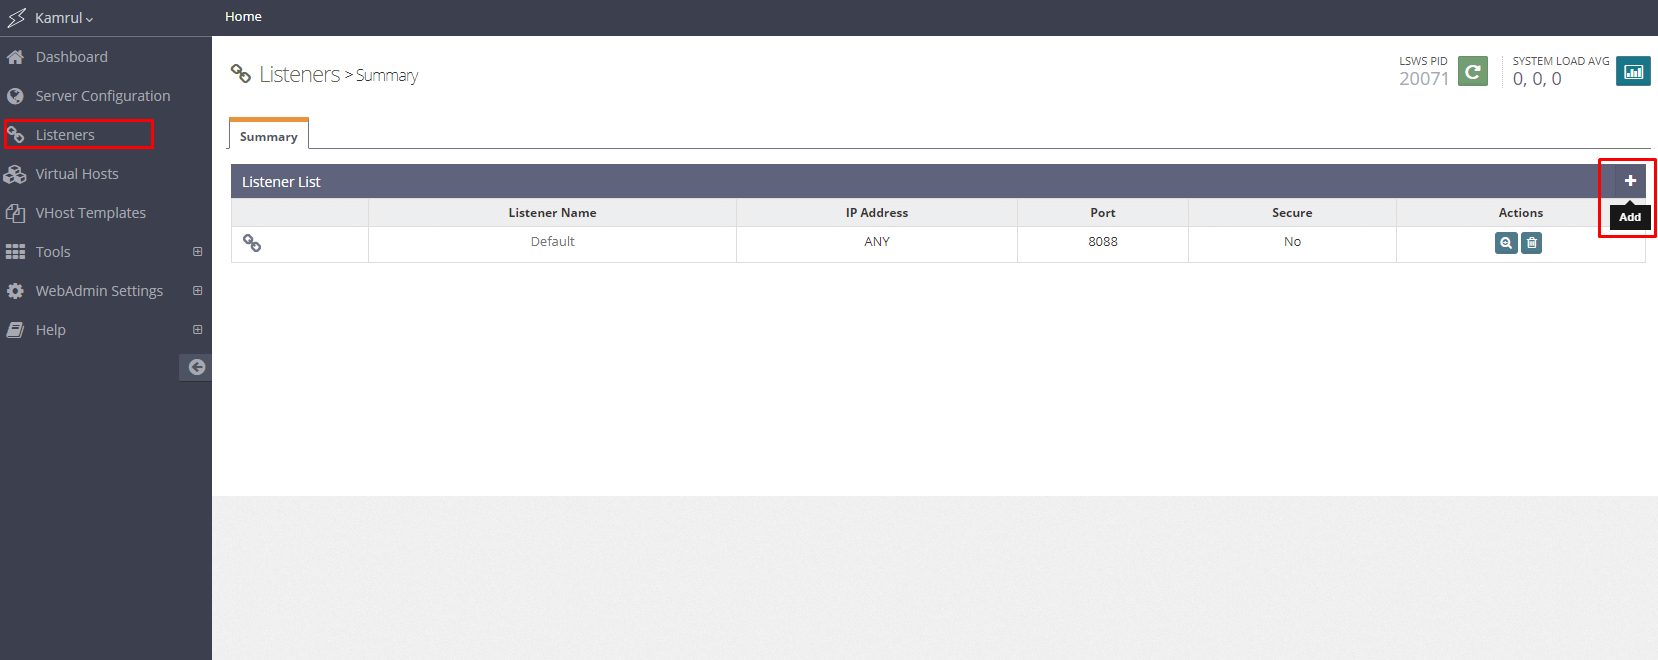
- Login to OpenLiteSpeed control panel and navigate to “Listeners” and click “Add”
Set the following values:
Listener name: 443 (or any name)
IP Address: ANY
Port: 443
Secure: Yes
Click Save icon

- Your newly created listener will be added to listener list. Now click “View” to open the listener

- Go to “SSL” tab and click edit
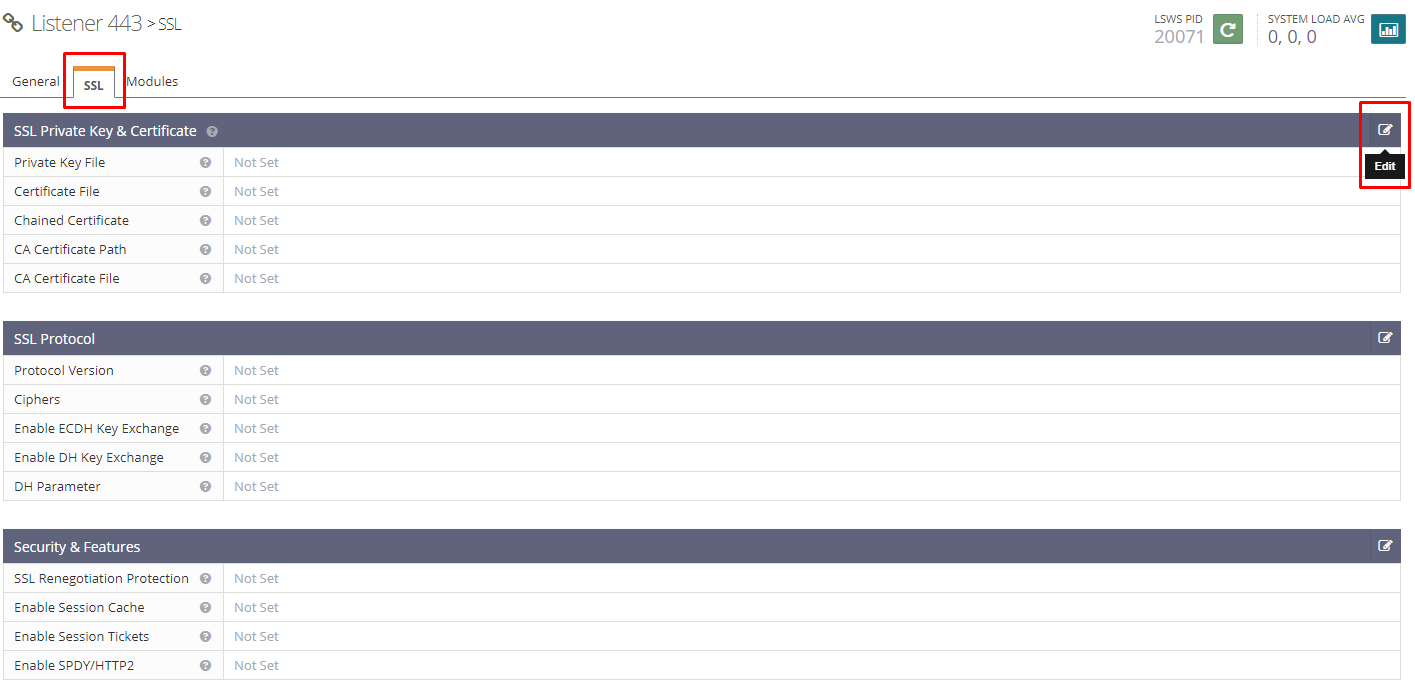
- Fill out the following values:
Private Key File: /usr/local/lsws/conf/cert/server.key
Certificate FIle: /usr/local/lsws/conf/cert/server.pem
Save the settings.
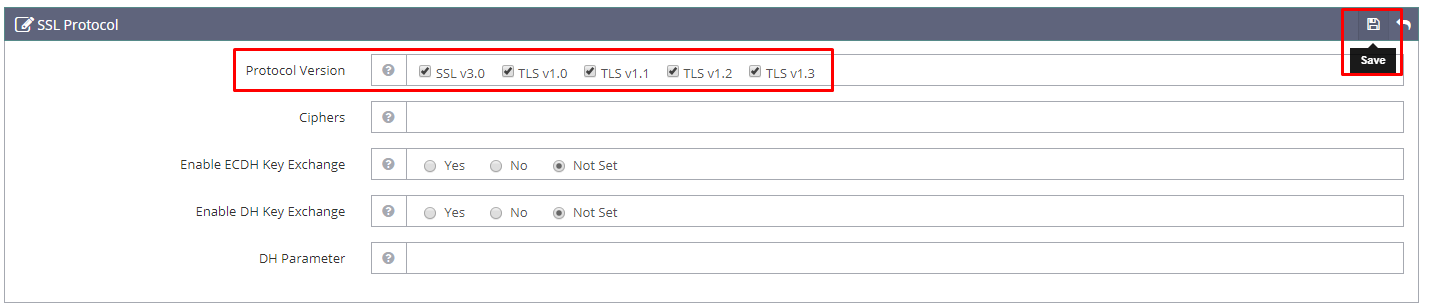
- Get back to the “SSL” tab and click “Edit” icon in “SSL Protocol” settings

-
Select all the checkboxes in “Protocol Version” and click save icon
-
Now head back to the “Listeners” > “General” tab. Under “Virtual Host Mappings”, click “Add”

-
Set “Virtual Host” for your domain and specify the domain name (example10.com). If you didn’t create a Virtual Host for your domain, we recommand you to follow how to setup virtual host for a domain. Click save icon.
Now try to visit your domain with https protocol. If you follow all the above steps correctly, it should work. If it doesn’t, check your Web Server log for error details.